 |
| Hmmm! It could use a little adjusting! I'm going to list until I have a reasonable amount in my Etsy shop. It's only 20 cents per item. Of course, there's more to pay if you actually sell something. We'll see how it goes. :) |
Thursday, August 30, 2012
A Dress for Supersize Barbie


Wednesday, August 29, 2012
Knit Halter Dresses for Tyler, Ellowyne,more
 |
| Knit from sock yarn in a three one rib, this dress is rather form fitting. |
 |
| This dress has silver threads running through it. Both of these dresses were nearly done. Today, I put in the fasteners, took the photos and listed them on Etsy. Suddenly it occurred to me: I have something "doll" for my blog! :) |
Friday, August 24, 2012
Those Dresses
 |
| Since I do not plan to show pictures of the bodies, (and they are in the dump, any way) here's what can be seen of the "lamented" dolls about which I posted. |
Tuesday, August 14, 2012
Doll Lover's Lament?
The doll in the box
Had long brown locks
And her dress was as sweet as they came.
Her hair was a mess
And so was her dress,
But Aunt Lou bought her just the same.
Oh, no (oh, no)
Oh, no! (oh,no)
Oh, what should be done with Aunt Lou?
Even at a bargain price
This doll wasn't very nice.
What's a poor old doll hoarder to do?
Tuesday, July 31, 2012
Hello!
 |
| I |
 |
| am |
 |
| Velvet! (by Ideal) Velvet was very dirty, when she came here a few weeks ago. Having had a bath and shampoo, she looks much better. I think I missed a smudge, or two. :) |
Thursday, July 19, 2012
Simple Skirt from Two Rectangles
 |
| First, you'll need a doll. |
 |
| You will need some fabric. These are scraps left after I made a new dress for Spring, about 20 years ago. |
 |
| A measuring tape is not absolutely necessary. It can help. With the tape, or with the fabric itself, determine how long a rectangle is need for the waistband. |
 |
| The fabric for both rectangles should be quite square. Be sure to add seam allowances on both ends PLUS the overlap you want for the fastenings. If the waistband is too tight it is difficult to fasten. If the waistband is too loose, you may not like the way it looks. |
 |
| Decide how wide a waistband you want. Double that width and add two seam allowances. Here, I thought about 1/2 inch would be good. 1/2 X 2 = 1 inch. I don't usually need 1/2 inch seam allowances, but decided to be generous. Two half inch seam allowances add another inch. I cut my waist band piece 2 inches wide. |
 |
| Cutting the waistband To square the fabric I pulled a thread out of the piece and cut along that line. You may not want to be that fussy. I like to fuss. :) An even plaid, like a gingham check, makes squaring the fabric easy. |
 |
| I folded the waistband over twice and checked that it was long enough to go around her waist and overlap AND have room for seam allowances. No problem. :) |
 |
| Similarly, measure and cut the skirt rectangle, remembering to allow for the back seam, the waist seam and a hem, if you wish to have a hem. |
 |
| Measure and cut into the seam allowance to mark for the placket. The placket allows the skirt to open up to slide over the hips. |
 |
| Here, methods diverge. I have sewn up the back seam to the slit that marks the placket. You may wish to skip this step and do it later. That way, the piece will stay flat a little longer. |
 |
| When the back seam is sewn, I double over the fabric and sew it down. I like as few raw edges showing as possible, so I fold it over, then over, again. |
 |
| I made the waistband by folding the rectangle in half, lengthwise. I sewed the short edges together. This is done with the right side of the fabric inside. |
 |
| Then I turned the waistband right side out and checked it for size, again. |
 |
| I gathered, or shirred this skirt. A running stitch above the line where I will eventually sew the waistband on is pulled until the resulting width of the skirt matches the length of the sewn waistband. |
 |
| I pinned the ends of the waistband to the edges of the placket, right sides of the fabric together, or facing each other. |
 |
| Then I pinned along that edge, arranging the gathers where I wanted them to go. |
 |
| This blurry picture is supposed to show what it looked like from the waistband side. |
 |
| I sewed that together. Since this is so lightly gathered, I used a running stitch. When I gather more tightly, I use a back stitch, or I use the sewing machine. |
 |
| This is what it looked like with that seam finished and the pins removed. |
 |
| Then, I turned the inside edge of the waistband under and sewed it to the skirt on the inside. |
 |
| I sewed a snap on the waistband. I nearly sewed both halves to the same side of the waistband, but I caught myself in time and sewed one on the inside and one on the outside, so the waistband would overlap. |
 |
| I hemmed the skirt. This hem was a selvage edge, so I could have just left it unhemmed. |
 |
| And, we have a skirt. (And that skirt could use a good press!) I'll try to give some tips on variations in style, sometime. If I forget, you remind me! |
Wednesday, July 18, 2012
A Simple Skirt - with Elastic Waist
 |
| You'll need a doll and a scrap of fabric. |
 |
| Be sure the fabric is big enough to go around the doll and then some. In other words, you'll need seam allowance. The fabric must be longer than you want the skirt to be, too. You'll need extra for the elastic sleeve at the waist. You may want to put a hem in the skirt, too. |
 |
| Square up the fabric. I like to pull a thread and cut along the line it leaves. That is a slow method. Any way you can achieve a piece with four 90 degree corners is good. If the edges run square with the grain of the fabric, the seams and the finished skirt are less likely to warp. |
 |
| Sew up the back seam. This fabric ravels easily and is thin. I sewed a "french" seam. That is a double seam. I sew the seam with the wrong sides together, then trim it, turn the skirt inside out and sew again, hiding the cut edges inside the seam. Pressing is a good idea. I was in too much haste! |
 |
| Turn down the top of the tube to make a casing for the elastic. Turning under the edge of the casing to hide the cut edge makes a nicer look and keeps that fraying down. Stitch the casing. Be sure to leave a space for stringing the elastic through. |
 |
| This is what it looks like. |
 |
| String the elastic through the casing. Baby elastic is good for small doll clothes. I used elastic cord. (This skirt is not meant to be beautiful.) For methods of stringing elastic, check other sources. If you don't find anything, I'll try to cover that, too. As an alternative, sew the elastic into a loop and fold the skirt top down over it, then stitch the fabric down. There are other methods for adding elastic. Well, I can think of one... |
 |
| Be sure to fit the elastic so that is will stretch over the doll's hips. |
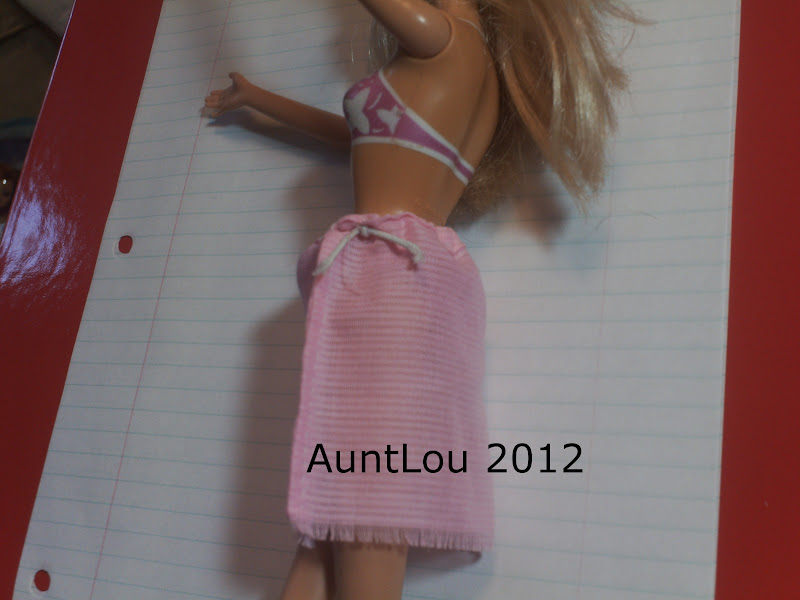 |
| Stitch the elastic firmly together. In this case, (or casing?) I tied the elastic cord. |
 |
| Check the fit. |
 |
| Turn the skirt right side out. I left mine fringed. Turning a hem gives a nice, finished look. If I do turn a hem, remembering to do it before I put in the elastic makes it easier to press the hem. |
 |
| Turn the seam to the center back. This skirt sure could use a press! |
 |
| Sliding the skirt up over the bust makes it into a simple top. If it is long enough, it could be a dress. Adding a belt gives it some shape. This is the first kind of skirt I remember sewing. We also would wrap a piece of cloth around a doll, then pin it or tie a strip of cloth or a piece of yarn around it. The other no sew skirt we made was a circle with a tiny hole cut into the center. Now, I had intentions of doing a step-by-step for my two rectangle skirt. I made one and took the pictures. I'm still working on the instructions. |
Subscribe to:
Posts (Atom)